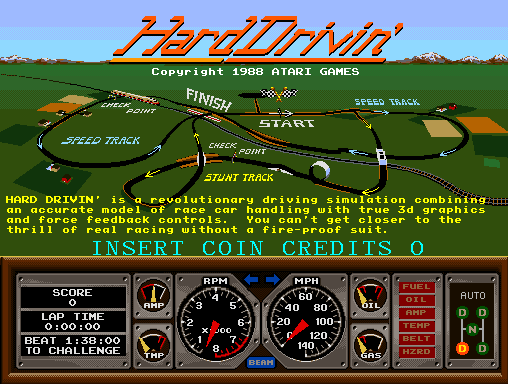
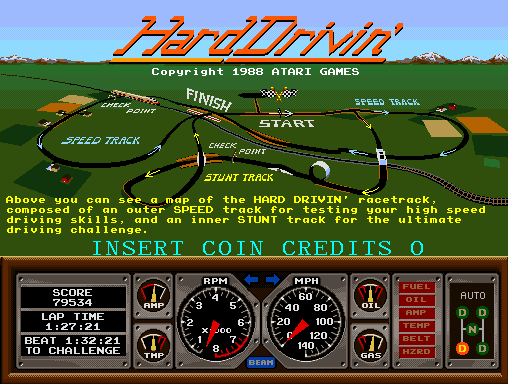
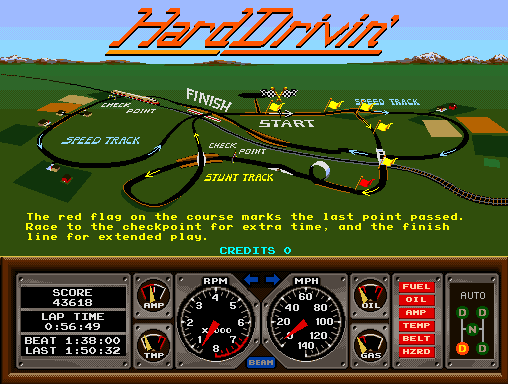
Hard Drivin’ Arcade
Atari released the game Hard Drivin’ in 1989. It was a driving simulator with its primary attraction being the stunt course.
Road into the Sky
The stunt track had a loop-de-loop in the road. I still remember seeing a screen shot of the arcade in a magazine, with the road going into the sky. It wasn’t the fact that it was a loop that was so shocking and amazing about it. It was that the road literally went so high that it went out of view of the monitor. The size of the loop blew me away. It is a road that goes into the sky! It is kind of similar to one of the Wacky Wednesday pages which shows a road going straight up. But at least it comes back down. Exactly how fast would you have to go to be able to survive this?
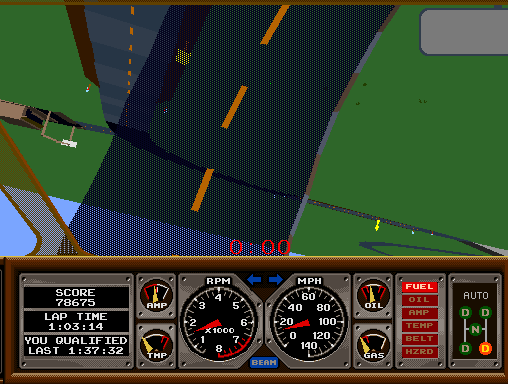
Here’s a quick capture of a similar shot:
Some more incredible loop-de-loop shots:
And, of course, failing to have enough speed on the loop:
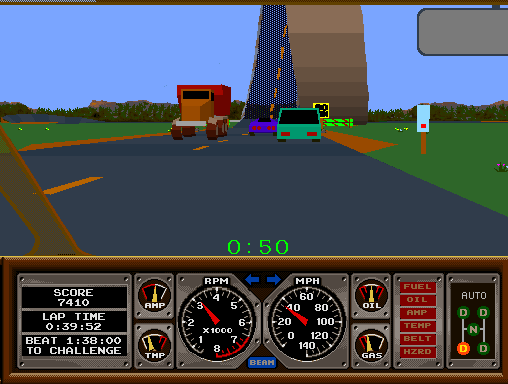
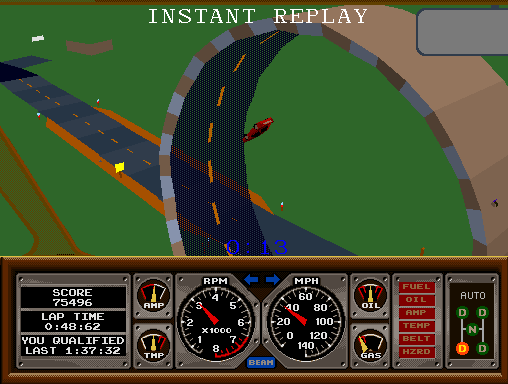
With the INSTANT REPLY that was so iconic for the game — in fact, many people got a kick out of crashing on purpose, such as flying off of the loop, or ramping the jumps at maximum speed — just to see the result and the replay.
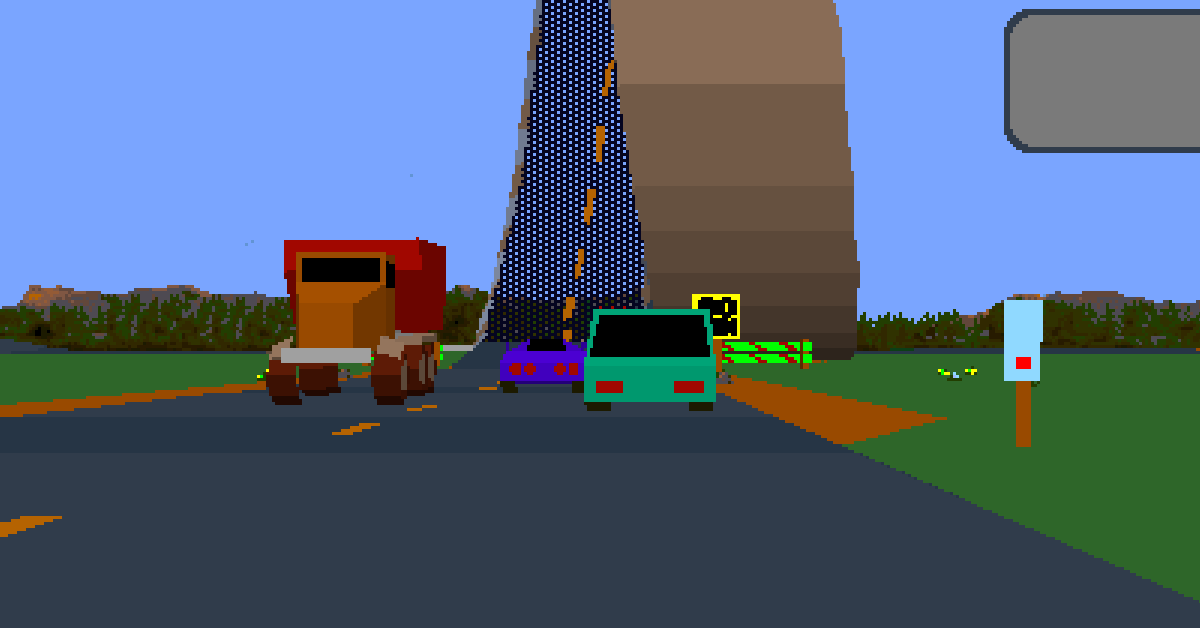
My previous question regarding the speed needed was attempting to convey the emotion I felt. Now that I have played the game, I know the actual answer. The game has a “60 MIN” speed sign, meaning minimum of 60 miles per hour (about 100 kilometers per hour). In fact, the other traffic (composed of sports cars, and regular cars, trucks, and even what I always thought was a very large dump truck) can go around it seemingly much slower. The first car you see go around it is the very large dump truck. The other cars in the game don’t follow the physics that your car follows; they follow predetermined paths, with a few adjustments to try not to run through each other, and to also not crash into you.
Arcade Cabinet
The cabinet had a haptic (force feedback) vibrating steering wheel, an H-pattern manual shifting stick, a clutch, brake, and gas pedal, and even a turn-key to start the car. It offered 512 x 384 resolution in 256-colors (player/light source shading), which was much higher resolution than the standard 320 x 240 (or 240 x 320) arcades at the time.
Force Feedback
The feedback in the steering wheel was quite amazing — on the high score screen where you needed to enter your initials, the steering wheel would allow you to select the letter, and it would lock into each one. You could feel the bumps and feedback for each letter, so you could haptically understanding the number of letters you are moving through, and it would lock in after you stop giving force.
MAME Arcade Emulator
MAME is the Multiple Arcade Machine Emulator. Its primary purpose is to preserve vintage arcade games by faithfully recreating their hardware. However, as an emulator, it simply takes care of allowing input to be injected into this hardware system. It will properly render the graphics output with audio, to be as authentic as possible.
Input System Replication
The problem is how do you replicate the hardware that injects the input? You basically need the original cabinet hardware: a racing wheel, with pedals, and a shifter.
Is this possible with simply an Xbox Gamepad?
Yes.
Xbox Gamepad Insufficiency
The steering wheel in Hard Drivin’ allows you to turn it (I am guessing) 180 degrees to either direction. This can allow you to spin the car around quickly at very low speeds, to get back onto the road when you’ve driven off. If you map this to a gamepad thumbstick from -1 to +1, this means that a significantly tiny range of that thumbstick input is useful for driving straight and making slight turns during normal driving / racing — just like a real steering wheel needs very little input for normal driving, but you want hand-over-hand wheel rotation for making a 90 degree turn in a parking lot, or entering / exiting onto a side-street.
Solution = Gamepad + Steam + MAME
You can play Hard Drivin’ arcade on MAME with just an Xbox Gamepad:
Hard Drivin’ Arcade with Xbox Gamepad
All of these scores were achieved with an Xbox controller:
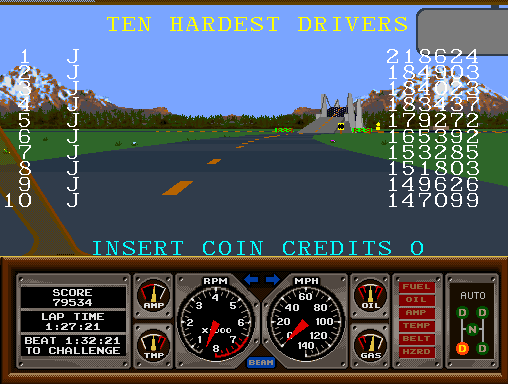
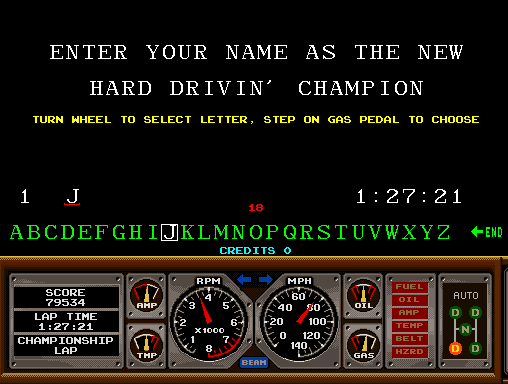
P.S. Why are they all signed with “J”, when Hard Drivin’ allows for up to 20 letters? Because the input massaging that allows a gamepad to be used as a precise steering wheel — the reason you are here –unfortunately limits the letter input in the high score name entry screen.
It even works for the much harder to control Race Drivin’!
Race Drivin’ Arcade with Xbox Gamepad
Pre-requisites
- Xbox Gamepad
- Steam (for Steam Input controller massaging)
- MAME (to run the emulation, but also additional input massaging)
- ROMs (the game; Hard Drivin’ arcade)
Gameplay Requirements
- Transmission Type
- Automatic
- This setup tutorial is tested with Automatic transmission only.
- Manual
- As-is, Manual transmission will not work.
- If you want to try Manual transmission, you will need to:
- Map the right thumbstick to the manual stick.
- Map a button or shoulder button to the clutch.
- Automatic
![]()
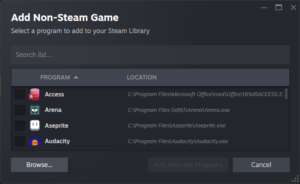
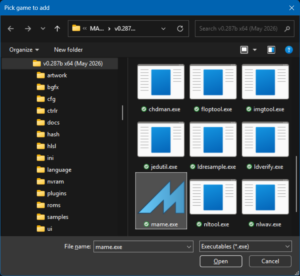
Step 1. Add MAME to Steam
This allows the game to be run from Steam, which means you can use Steam Input.
Steam Input allows massaging of gamepad input before MAME processes it.
Alternatives to avoid: Joystick Gremlin + vJoy + HidHide. These also massage gamepad input. Research each before use. Understand the implications they have. Installing device drivers impacts all software. These may not remove easily. Do your own research before use.

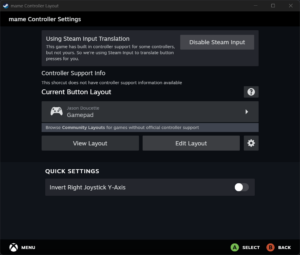
Step 2. Steam Input – Controller Layout
Make sure your gamepad is plugged in first, then select “Controller layout“.
If gamepad is not plugged in, you will not see “Controller layout” as a selection.
If gamepad is plugged in, select “Controller layout“.


Step 3. Steam Input – Edit Layout
Click “Edit Layout” in the bottom right.
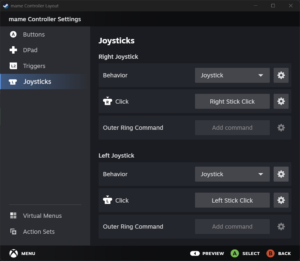
Step 4. Steam Input – Joysticks
Click “Joysticks” in the left bar:
Note: the Right joystick appears first, then the Left joystick appears after.
For the Left Joystick, under Behavior, select the gear icon.
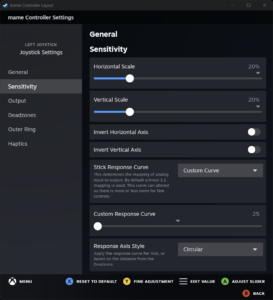
Step 5. Steam Input – Adjustments
Set the following adjustments:
- Sensitivity
- Horizontal Scale = 20%
- Vertical Scale = 20%
- What this does:
- This compresses the X and Y gamepad values from -1..+1 to be from -0.20..+0.20.
- This limits the amount the steering wheel can rotate to only 20% of its full extent.
- This gives you greater accuracy while driving / racing.
- This restricts your ability to turn sharply to get back onto the road if you run off.
- This also restricts the letters you can use during high score name entry. Thus I sign with just “J”.
- Stick Response Curve = Custom Curve
- This will enable this setting:
- Custom Response Curve = 25
- I would put this lower if I could, but it is the minimal value.
- What this does:
- This massages the thumbsticks, such that you have finer control near steering wheel center.
- This will enable this setting:
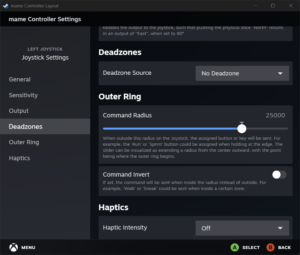
Step 6. Steam Input = Deadzone
Set Deadzone Source = No Deadzone.
This allows the raw input data from your gamepad to be given to the game.
Gamepads have proportional thumbsticks which have two interesting characteristics:
- They have high accuracy for delta motion.
- If you adjust a thumbstick slightly, the resultant X and Y data from the gamepad will showcase a very accurate change in those values.
- They have a low accuracy for absolute position.
- They “land” at rest at a different spot when you press in one direction and then let go.
- Thus the inclusion of a dead zone, which allow a small region of X,Y coordinates within which the game will assume you intend no input.
- We want to avoid this, since we need all user input to be injected into the game as steering input. We do not want a dead zone that eliminates motion.
- This means you need to be very accurate in your input at all times. It allows you to make small adjustments and see the results right away.
- It avoids the need to guess or hope that you are not inside the dead zone — as a dead zone eats up your input for now output, causing you to make ever-larger input, each time delayed (as you have to analyze the response, then adjust), to finally get out of the dead zone, now you are almost spinning your car out, or you are now steering correctly but far too late, causing even more input correction. This irregularity has to be removed.
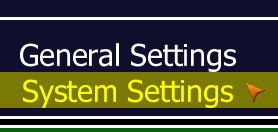
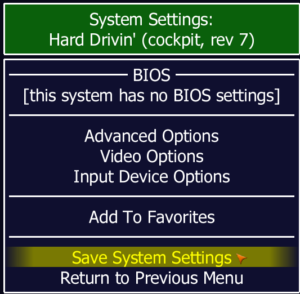
Step 7. MAME System Settings
MAME has two settings:
- General Settings
- Act as your global defaults.
- Applies to every game in your library.
- System Settings
- Overrides default settings for a specific game.
You should set the settings for just this game in particular:
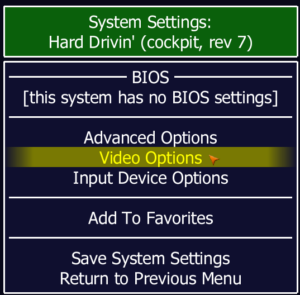
Step 8. MAME Advanced Options
In System Settings, selected Advanced Options:
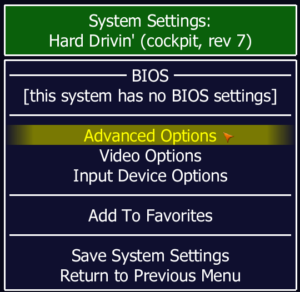
Set the following:
- Advanced Options
- Joystick Deadzone = 0
- Joystick Saturation = 1
- Joystick Threshold = 0
- What this does:
- Deadzone = 0:
- This must be set (turned off = zero), similarly to disablement in Steam Input.
- There is no “unresponsive zone” at the center. The moment you tilt the stick away from the exact center, the game registers movement.
- Saturation = 1:
- This is already set in Steam Input “Sensitivity”, thus no need to set it here.
- Pushing the stick to the edge of its physical range outputs the maximum value (1.0) to the emulator.
- Threshold = 0:
- This should have no impact.
- The activation point for “digital” actions (such as those from a D-Pad: Up, Down, Left, Right, Diagonals) from the analog sticks is set to the lowest value. This means it is invoked immediately, and I believe this helps ensure the shifter is never left in Neutral, but it may not matter.
- Deadzone = 0:
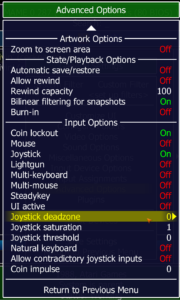
Then save:
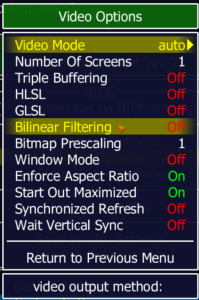
Step 9. MAME Video Options
In System Settings, selected Video Options:
Ensure Bilinear Filtering = Off.
This keeps the pixels sharp, and not blurred.
Step 10. How to Play
Recommendations:
- Gamepad controller
- Always hold up on the left thumbstick.
- Make very small adjustments to turn.
- Note that without a deadzone, any change in position invokes steering input.
- Read and respond to the car’s immediate reaction to your input — this let’s you know where center actually is.
- Pay close attention to this.
- This is your center point of your steering wheel.
- Near the center, the input is massaged to be more precise.
- Steering input becomes more impactful further away.
- You will want to be going straight — not turning — when you take a jump, and when you land.
- Holding fully left or right is only turning the wheel a bit; it will be hard to sharply turn to get back onto the road when off road.
- Holding largely left or right can invoke a skid, and can regain control when sliding.
- Hard Drivin’ gameplay
- Sharp wheel jerks can be useful on the banked turn, or on high speed turns, to invoke a slide or to regain control from a slide.
- Always go airborne straight, not turning.
- When landing, keep the wheel straight.
- Let go of the gas if you want to regain control (typically some acceleration pressure would settle the car, but not full gas, which is easy to do when you have a gamepad controller)
- Sideswiping other cars makes them move behind you.
- Cutting corners in the grass has a surprising amount of grip, but you lose speed rapidly.
- Take the first cliff at < 70 mph
- Take the first jump at < 80 mph
- Take the first ramp (after the loop) at ~60 mph
- You can take the banked curve at full throttle the whole way through; it can work consistently well, but requires sharp turn input to start.
- Ease off the gas to regain a bit of steering control.
Enjoy!
Title Screens
![]()

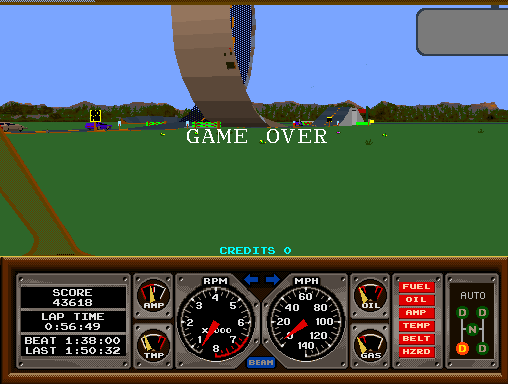
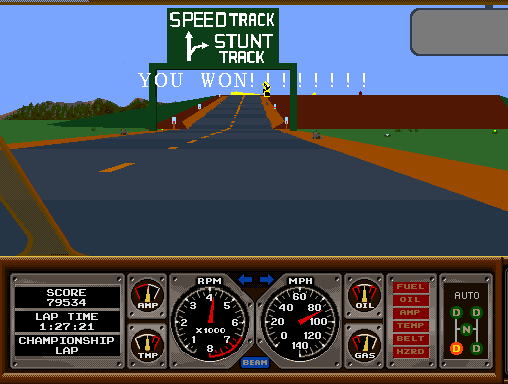
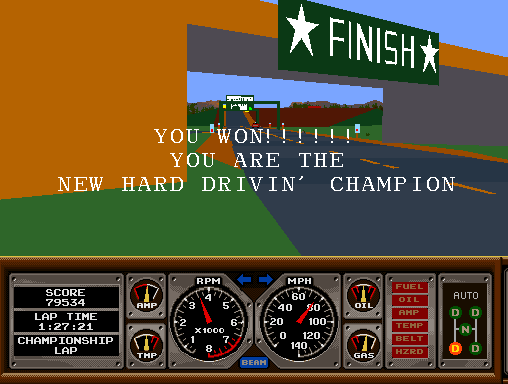
Game Over
Hard Drivin’ Champion
Beating the game against the Phantom Photon.
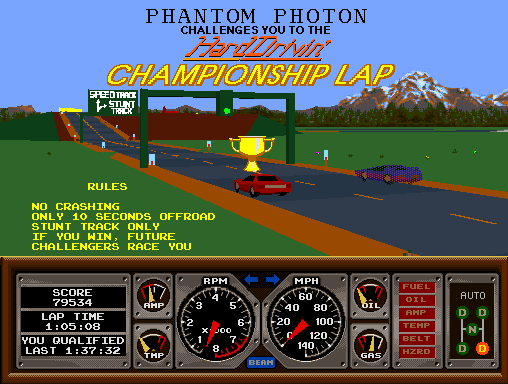
Stunt track only. Or is it?


Leave a Reply
You must be logged in to post a comment.